Monday, September 30, 2013

AX2012 R2 CU6 Code Upgrade Checklist Error

If you are planning to do an In-Place code upgrade (AX2012 to AX2012 R2) and you are on CU6 there is a high chance you will get this little problem.

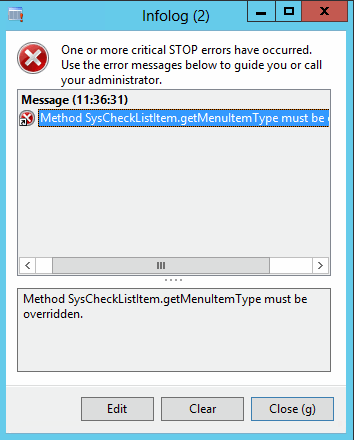
When you start the client and select the in-place code upgrade you get this error:
"Method SysCheckListItem.getMenuItemType must be overridden."


The solution is simply to just add one single method to one class.


In the SysChecklistItem_FixAxIDs add the method getMenuItemType and make it return the MenuItemType::Display enum value.


Compile the class and try run the checklist again. This is already documented on the download page for the update, but easy to miss. I'll admit I missed it the first time. If you searched for the error, hopefully you came here and you are now already back on track. :-)

Monday, September 9, 2013

Export list of model elements to Excel using PowerShell

So you want to get a list of all elements in a given model?
I tend to do it now and then, so here is how I do it.

Simply use the Get-AxModel to collect the details and pipe it to a Export-CSV.

(Get-AXModel -Model 'MyModel' -Details).Elements | select path, elementtype | `
Export-Csv -NoTypeInformation -Delimiter ';' c:\mymodel.csv

I've added the -NoTypeInformation to remove some unnecessary information, and I wanted to have the semicolon as delimiter in order for the file to open seamlessly in Excel 2013.


You can also list out other information as columns like the ElementHandle and ParentHandle.

Saturday, August 24, 2013

No colors when comparing code in AX

This is just a quick post on one of the annoyances when comparing elements in AX after the installing the latest version of Internet Explorer 10. Our beloved compare form suddenly doesn't show the red and blue color any more.


Apparently the latest version of the browser, IE10, doesn't support the gradient filter (CSS in HTML) once used for displaying the left hand side color boxes.

While it's not that big of an issue, I still felt compelled to sort it out. First I tried using some standard gradient CSS picked up from ColorZilla, but ended up using just static colors. I got the gradient to show OK in the browser, but not in the Ax form. Anyway, I just wanted the colors and not the fancy effects.


The solution is easy. Just change the HTML code put in the ActiveX components. Comment out the fancy gradient stuff and put on your own red and blue. Here is how I did it:


If anyone feels like sharing a different solution, please comment. For all I know, this will be sorted when Internet Explorer 11 is released. :-)

Update 9th of September

This problem is now solved in CU6 (6.2.1000.1437). They made the HTML complete with a CSS style section. I guess someone didn't want to throw out the gradient effect. ;-)


Monday, August 19, 2013

Compare models using PowerShell

I wrote this post about how to use PowerShell to compare two modelstores based on installed models. It is a simple comparison and only checks if the two have the same list of models.

In this post I will show how you can compare the list of elements in two models. This will only compare the actual list of elements, and not their metadata or code.

The Get-AxModel PowerShell command allows us to load both the Summary and Details of a certain model. It will list out information like the Name, Path, ElementHandle and ParentHandle, just to name a few.
First let us have a look at the Summary and Elements property, then later I will show how we can use the Compare command to easily compare two lists and pull out any differences.

For this example, I have created a small model named "MyModel" and added an EDT, a table field and dropped that field into a Grid in a form. I also made a private project for this model.
If I list out the Summary of this small model it would display this:

(Get-AXModel -Model "MyModel" -Details).Summary

Output


If I want to see a list of all the elements, I can run the same command but instead of the Summary I load the list of Elements:

(Get-AXModel -Model "MyModel" -Details).Elements | select path, elementtype | Format-Table -AutoSize

Output


Notice I explicitly select the path and elementtype, and just to make the output a bit prettier, I throw in a formatting statement in the end, Format-Table -AutoSize.

Now, I exported my model to a file (C:\mymodel.axmodel) and then added some additional elements to the model inside of AX.

I then compared the elements from the file with the model elements in the actual modelstore:

compare `
 -ReferenceObject ((Get-AXModel -Model "MyModel" -Details).Elements | select path, elementtype) `
 -DifferenceObject ((Get-AXModel -File c:\mymodel.axmodel -Details).Elements | select path, elementtype) `
 -PassThru -Property path, elementtype | sort path | Format-Table -AutoSize

Output


Notice how it list the SideIndicator to the left hand side, or the ReferenceObject list. Apparantly the model has a couple of elements more compared to the file. Yes, you can list out the elements from a file as well, as mentioned in this blog post. Again, it will not compare X++ code or metadata. Maybe in future versions, Microsoft will add a checksum or something we can compare for possible differences between two elements.

Finally a quick tip for loading long list of elements. If the list of elements grows beyond the height of the buffer, you will only see the last part of the list. You can "fix" this by increasing the Screen Buffer Size under Properties.


Enjoy!

Saturday, August 17, 2013

Logging Infolog to Event Viewer

This is probably a bit far fetched in real life, but still a cool feature built in AX 2012, and I really wanted to make a new blog post after a long summer vacation. Maybe someone will enjoy it still. :-)

This is already explained on the MSDN article "Propagate Infolog Messages to the Windows Event Log [AX 2012]", but I thought I'd throw in some screenshots just to make it even more appealing.

Obviously, this will only log client side as the Infolog push its messages to the client, and this tracing feature runs in the client scope.
There are some options to introduce server side logging using for example log4net. It is pretty good covered in this blog post, but it would require rewriting X++ code in order to trigger logging.

Developers will have the ability to use the static Debug::printDebug()-method to push any string to the debugger output window. These messages will open up the debugger, unless it isn't already running, and unless the output window is hidden, it should reveal the strings on the Debug-tab. Remember, in AX2012 only the users who are in the local (machine) usergroup named "Microsoft Dynamics AX Debugging Users" will see the debugger, as explained here.

Anyway, let us have a look at the easy and quick logging of Infolog messages.

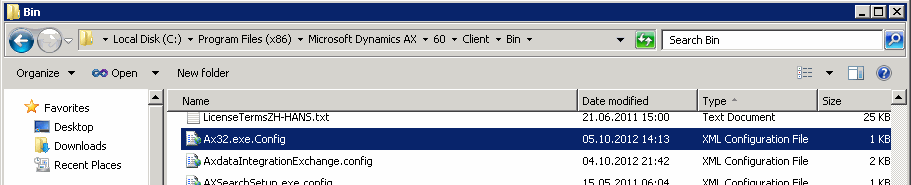
1) Start by locating the ax32.exe.config file, normally located under "C:\Program Files (x86)\Microsoft Dynamics AX\\Client\Bin\"


2) Open the file in notepad and add some additional XML sections in order to trigger the functionality. You can copy from the MSDN article or just type in what I have used.

3) In order to test this, let us create a simple job that triggers a Info, Warning and Error message.


4) Then let us open the Event Viewer and filter the log, just to focus on the events we just created.


4) Notice the Info-message was not included in my example, due to how I defined the switchValue only to include warnings and errors.


Now imagine having this set on a busy terminal server where everyone would be using the same logging setting. Depending on your requirements you could use this to preserve the most recent warnings and errors thrown to the client and browse through them when end users complain about all sorts of "mysterious" errors. Who haven't experienced end users complain about an error they can't remember the content of? Now you can go back and look in the Event Viewer and find it - hopefully.

Friday, July 5, 2013

Keep your AX2012 Modelstore performing

I had an interesting conversation with a very skilled and helpful Microsoft employee regarding maintenance of the Modelstore database. He sent me a SQL script prepared by the Microsoft Support Team.
First let's have a look at the proposed script, then let's look at why we would want to run it.

ALTER INDEX ALL ON [dbo].ModelElement REBUILD
ALTER INDEX ALL ON [dbo].ModelElementData REBUILD
ALTER INDEX ALL ON [dbo].Sources REBUILD
ALTER INDEX ALL ON [dbo].ModelElementLabel REBUILD
ALTER INDEX ALL ON [dbo].MODELSECPOLRUNTIMEEX REBUILD
ALTER INDEX ALL ON [dbo].ModelSecurityCommon REBUILD
ALTER INDEX ALL ON [dbo].ModelSecurityPermission REBUILD
ALTER INDEX ALL ON [dbo].ModelSecurityPolicy REBUILD
ALTER INDEX ALL ON [dbo].ModelSecurityPolicyConstraint REBUILD
ALTER INDEX ALL ON [dbo].ModelSecurityPolicyTable REBUILD
ALTER INDEX ALL ON [dbo].ModelSecurityRole REBUILD
ALTER INDEX ALL ON [dbo].ModelSecurityHierarchyCache REBUILD
ALTER INDEX ALL ON [dbo].ModelSecuritySubRole REBUILD
 
UPDATE STATISTICS [dbo].ModelElement WITH FULLSCAN, COLUMNS
UPDATE STATISTICS [dbo].ModelElementData WITH FULLSCAN, COLUMNS
UPDATE STATISTICS [dbo].Sources WITH FULLSCAN, COLUMNS
UPDATE STATISTICS [dbo].ModelElementLabel WITH FULLSCAN, COLUMNS
UPDATE STATISTICS [dbo].MODELSECPOLRUNTIMEEX WITH FULLSCAN, COLUMNS
UPDATE STATISTICS [dbo].ModelSecurityCommon WITH FULLSCAN, COLUMNS
UPDATE STATISTICS [dbo].ModelSecurityPermission WITH FULLSCAN, COLUMNS
UPDATE STATISTICS [dbo].ModelSecurityPolicy WITH FULLSCAN, COLUMNS
UPDATE STATISTICS [dbo].ModelSecurityPolicyConstraint WITH FULLSCAN, COLUMNS
UPDATE STATISTICS [dbo].ModelSecurityPolicyTable WITH FULLSCAN, COLUMNS
UPDATE STATISTICS [dbo].ModelSecurityRole WITH FULLSCAN, COLUMNS
UPDATE STATISTICS [dbo].ModelSecurityHierarchyCache WITH FULLSCAN, COLUMNS
UPDATE STATISTICS [dbo].ModelSecuritySubRole WITH FULLSCAN, COLUMNS

Before I created this post I did a quick test on one of my Modelstores and I gained a little bit on the compilation time, from 1h 53m to 1h 47m. That is just an improvement of 5 minute. This particular Modelstore only contained a vanilla R2 with DIEF, so it's not exactly a grand example.


We know the Modelstore of R2 is between 3,5 and 4 GB. The Modelstore database will easily be double the size. It will contain large indexes to support the tables. The image above shows some of the biggest tables with their indexes. We also know there is a hotfix released that makes a small adjustment to the schema reducing the compilation time by 20-40%.

Why bother to rebuild the indexes of the Modelstore and update the statistics? Well, obviously every time you fill it with a new awesome model, it creates new records in the Model-tables for each single element in that model. You probably uninstall less awesome models once in a while, leaving gaps in your indexes. Perfectly normal in a development environment. So running the script above once a week wouldn't hurt anyone - most likely just be an advantage.

The rebuild of the indexes will completely rebuild the index instead of just reorganizing the leafs. Since we want column statistics to be fully updated, we then run a new set of statements to make full scans and update any column statistics. Running this will make sure the model database is fit 4 fight. :-)

Monday, April 29, 2013

Setting up RapidStart for AX2012

I have just recently starting to work with Microsofts Dynamics RapidStart Services, and I would like to share my hints and tips for getting it up and running successfully - from a technical point of view. I have still some ground to cover, so I'll blog some more when I get there.

If you don't know what RapidStart Services is, then you're missing out. To put it short, the idea is to have a web site holding the parameters and data. These data can be maintained by the customer and the partner. This is a great tool for doing implementation projects, but it can also be used for quickly creating a demo or development environment. While the current version doesn't cover ALL possible parameters and data entities, the framework covers a whole lot.

So let's get started!

These are the major components in this installation:

  • A fully working AOS with Microsoft Dynamics AX 2012. All code compiled without error and CIL compiled successfully. 
  • The latest version of Data Import Export Framework. Installed and configured. Download from InformationSource. 
  • Latest version of the ERP RapidStart Connector. Download from CustomerSource or PartnerSource.(direct link)
  • A browser with Silverlight addon. Yea, Internet Explorer does work. 
  • A dedicated user in your Active Directory.

Service Account

Start by making a dedicated account. Don't use your own, or you will break the connector when you change your password. When installing the connector you will be asked to provide the username and password for this account, and the service installed will run under this account. You also need to add this account as a user in AX. Give it full access rights, unless you want to spend time figuring out which roles to chose. There are no built-in "Rapid Start" role.

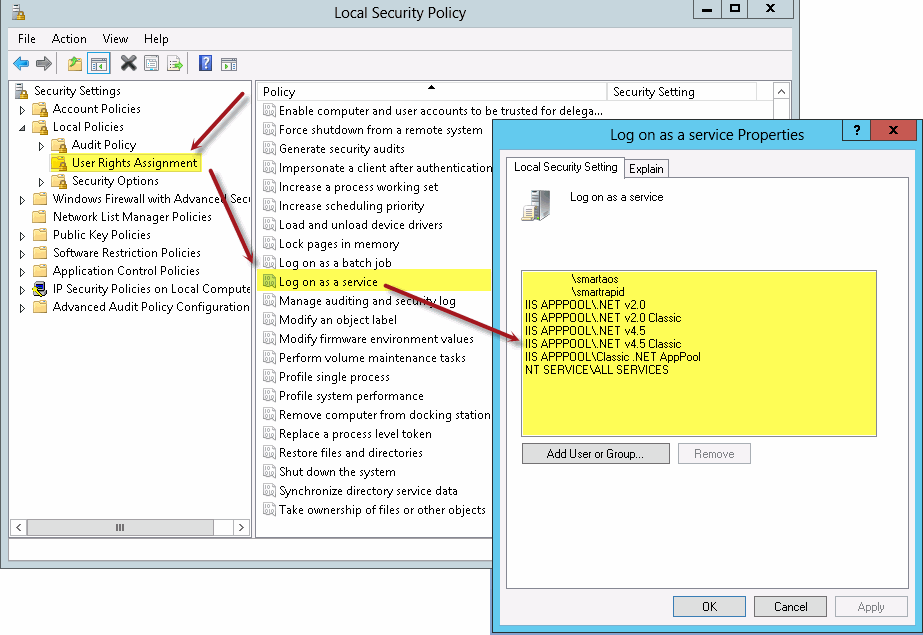
Since this will be a service account user, you will also have to add this user to the Local Policy rules with "Log in as a service".


You will also find the log file in this users application data folder (example C:\Users\daxrapid\AppData\Local\Temp\Microsoft.Dynamics.Framework.RapidStart.Connector\8.2.327.0\RapidStartConnector.log).
This log will be extra helpful for debugging why the Connector fails, if that happens.


ERP RapidStart Services Connector

Install the ERP RapidStart Services Connector. At the time of writing, I am running version 8.2.327.0. Head over to "Programs and Features" and make sure you don't have any older versions installed. There should only be one, and make sure you have the most recent one. You can uninstall and install this component as many times you need. This components must be installed on the same machine as the AOS. Maybe they will change this later on, but right now it only works if it sits on the server running the AOS. I've read that it will require one Connector for each AOS you want to connect to, but I will test that further.

Data Import Export Framework

You need this installed and prepared for the connector to be able to push and pull data. Installing this component is a topic on its own. Right now, this model gets installed in the FPK-layer, so it should be relatively easy to get it in. Again, make sure your AOT compiles without errors.

You need to manually enable one of the Service Groups after installing the model. This Service Group has its "AutoDeploy" set to "No", so you will have to manually deploy and verify it is active. The services needed for the connector to work are:
  • AifGDS
  • AppConfigServices
  • MetadataService
  • QueryService
  • DMFService

Except for the Metadata- and QueryService, you will need to check these and make sure they are running.


You also need to create a special Source Data Format and choose it as your format when using the ERP Connector. The format should be delimited file, first row active, row by CR+LF and column by comma. Head over to Parameters and clear out "Ignore Errors" as well.

Ready to Connect

When you start the ERP RapidStart Services Connector the first time, it will be without any Activation ID (GUID). Fill in the servername and the WSDL port. Head over to "Data Import Export Framework"-tab and select the Source Data Format you created earlier. Save the changes. Back to the "General"-tab and hit the Active-button. A link to the RapidStart page is enabled.Now you can start the Service. 


It will launch the RapidStart website where you can login using your Live-ID. After choosing a customer and a Service, you will be asked to choose which endpoint you will use. Select endpoint and hit Submit.
Next you can click "Manage Endpoint" and start creating projects or importing metadata through the ERP Connector.

Troubles in paradise?

If the service doesn't start, check the Evenlog or the RapidStart log file. Did you remember to add the RapidStart service account as user in AX? Did you give it admin access? Forgot to add the user with "Log on as Service" in Local Policy?

Is the connector being blocked by a firewall? Expect http (TCP 80) and https (TCP 443) in addition to TCP 9350-9354. Simply check by disabling the firewall. If it works, turn it back on and enable the traffic.
Did you make sure the Service Endpoints inside AX are Active?

Still having issues? Comment below, or head over to the Community Forum and get help.

Some other good sources: