Showing posts with label Life Cycle Services. Show all posts

Friday, January 25, 2019

Connecting Azure DevOps with Lifecycle Services for Release pipelines

A week ago, Microsoft annouced the release of a new Azure DevOps Task. Followed by more details the setup from the announcements author, Joris de Gruyter. And with the help of this post by Business Application MVP, Munib Ahmed, I sat down and ran through the setup a couple of days ago.

I wanted to briefly add some additional thoughts as well, some considerations of my own, while we wait for the official documentation.

This new feature is very quick and easy to setup, and is something everyone should adopt sooner than later. It shaves off the time spent downloading the complete build artifact somewhere and then uploading it to the Dynamics Lifecycle Services Project Asset Library. After a successful build of the full application you will get the package automatically "released" and uploaded to the asset library.

We expect more "tasks" to be added, allowing us to setup a release pipeline that also let us automatically install a successful build on a designated target environment. So getting this setup now, and have the connection working, will set the stage for adding the next features as they are announced.

Here are some of the requirements and considerations while you set this up:

  • You need to register an Azure Application of type Native (public, multi-tenant). While it is said you can use the preview experience to register the app in the Azure Portal, I had to use the "non-preview" experience, to ensure I got a correct Native Azure app registration, and not a Web app. While you can add the necessary permissions setup (user_impersonation), you need to run the admin consent for the permissions to work. If you are setting it up, and you are not Global Admin or Application Admin, then you will need to get someone else with necessary permissions to run the admin consent part. 
  • The connection also requires user credentials as part of the setup. This should not be a just any user, if you think about it. You don't want the connection to break just because the password was changed, or the user was disabled. Also multi-factor (or two-factor) authentication will not work here. So you might want to create yourself a dedicated user for this connection. The user does not need any licenses, just a normal cloud user you have setup and logged on with at least once. Also the user needs to be added to the Lifecycle Services project with at least Team member permissions (access to upload to Asset Library). Log on to LCS with the user once and verify access.
  • When you create the release pipeline for the first time, you will need to install the Azure DevOps task extension. Search for "Dynamics" and you should find the "Dynamics 365 Unified Operations Tools". If you are doing the setup with a user that has access to many different Azure DevOps organizations (ie. you're the partner developer doing this cross multiple customers), you will need to make sure you install it on the correct Azure DevOps Organization. When it is installed, you will have to refresh the task selection to see the new available task(s), including the new task named "Dynamics Lifecycle Services (LCS) Asset Upload". 
  • When configuring the task, you will want to use variables to replace parts of the strings, like the name of the asset, the description, and so on. When you run a release, one of the steps actually list out all the available variables, though with a slightly different syntax. Have a look at the list of available variables on this article, plus the top on how to see the values they are populated with upon a run.
If you already have a successful build ready, go ahead and setup the release pipeline and run it once to see it succeed - or fail. If it fails while trying to connect, it could be one of the following errors:
  • AADSTS65001: The user or administrator has not consented to use the application with ID '***' named 'NAME_OF_APP'. Send an interactive authorization request for this user and resource.
    Here you have not successfully run the admin consent. Someone with proper permissions needs to run the "Grant permissions" in the Azure Portal.
  • AADSTS50076: Due to a configuration change made by your administrator, or because you moved to a new location, you must use multi-factor authentication to access.
    This is most likely because the user credentials used on the connection is secured with multi-factor authentication. Either use a different account without MFA, or disable it. Most likely it is on for the account for a reason. 
I would strongly encourage everyone to set this up, and feel free to use the community forums, Twitter or ask on the comments section, if you run into issues.

Sunday, November 25, 2018

Considerations when "upgrading" Dyn365FO from 8.0 to 8.1

Version 8.0 of Microsoft Dynamics 365 for Finance and Operations was released summer 2018. Just a few months later, in October, version 8.1 was released. If you have environments running version 8.0, let it be development environments, demo environments, or even production and (tier 2+) sandboxes, you might be thinking about getting them "upgraded" to 8.1.
It's not really an upgrade, but actually rather an update.

The overall process is actually a lot easier compared with coming from 7.x. I did a series of posts on how to get started here:
https://yetanotherdynamicsaxblog.blogspot.com/2018/11/upgrade-from-7x-to-8-series-post-1.html

Microsoft outlines the process in one single article here:
https://docs.microsoft.com/en-us/dynamics365/unified-operations/dev-itpro/migration-upgrade/appupdate-80-81

Why update?

One of the main differences between 8.0 and 8.1 is the latter version will be a lot easier to service with updates. Version 8.0 still supports individual application hotfixes, meaning you will download and apply them, put them in VSTS, just as you would with 7.x. You could argue the possibility to pick individual hotfixes and avoid taking all updates is a good thing, but in fact it is not the way forward. Instead of thinking that you may have to avoid hotfixes, and potentially have to "roll back" updates that breaks you, you need to shift to a mindset where any ongoing issues are immediately reported back to Microsoft which allows them to ship new updates that resolves any issues, not only for you, but for us all. With that mindset, you will want to take the 8.1 version, which does not allow for individual hotfixes, but instead gives you everything cumulative at the point you pick updates. This is also how "One Version" will behave, and on April 2019 you will be getting updates in this fashion.


So in effect, when servicing 8.1+ you get only one update tile, and it contains everything, and you download everything cumulative. You'll use the complete update package to patch your environments, and there is no need to put the updates in VSTS either. Things are just so much easier.

Development and build environments

Even though Microsoft has a Software Deployable Package that does the update from 8.0 to 8.1 in the Shared Asset library in LCS, it is recommended that you deploy new 8.1 build and development environments. Why is that, you may ask. For a development environment, you will have both source code and a runtime (code compiled). Your 8.0 development environment might even have been updated with hotfixes, added back in time. Part of the process is to remove any 8.0 updates, and start from scratch with 8.1. So when you start removing already committed Microsoft application updates form Azure DevOps (VSTS), you cannot avoid this to also reflect your local copy of the source code.

But you do not need to compile Microsofts packages, so who cares if the code is wrong? Well, what if you want to debug, extend, view code? Even though you do not need to recompile Microsofts packages, you run the risk of having invalid, incomplete or even erroneous code on your development environment. So it just follows your best option is to redeploy a new set of development boxes and of course build box(es), and depending on your choice of server size and storage, the deploy of new servers they might be ready for you within 3-4 hours.

But before you connect the newly deployed development environments to the source code, it is paramount that you prepare a new 8.1 branch, which is clean from updates. It may contain 8.0 extension modules, but not any Microsoft modules. You can prepare all of this while the new environments are being deployed.

Non-development environments

What about demo, test and sandboxes? Well, typically you do not care about the source code on the demo boxes (even though it might be there), and as for acceptance test sandboxes, where you do not even have Visual Studio, it definitely doesn't matter. These environments you could just go ahead and update using the Software Deployable Package.


Well, unfortunately it might not just be that simple. If the environment has other non-Microsoft packages installed, LCS will prevent you from simply apply the update package. You may have some ISV-solutions or some package you've created and released, and then installed on the environment, through LCS.
LCS knows about this, and can list the non-Microsoft packages installed. In fact, if you try apply the update package, LCS will stop you, and list the packages blocking you.


Error: "Modules on the environment do not match with modules in the package. Missing modules: [...]"

In order to continue, you will need to get a pre-compiled version of these modules where they were built on a 8.1 environment. Depending on your scenario, that either means getting the 8.1 version from a vendor or partner, or simply just get your package built and released through your new and shiny 8.1 boxes.

As it is stated in the upgrade guide, you are recommended to prepare yourself one single build release of all the extension modules and packages. When you have the 8.1 package ready in the Asset Library, you can simply merge it with the update package, and execute the update.


If all your demo and test environments where using the same set of non-Microsoft packages and modules, you'll simply reuse the same merged package to update all of them.

Happy updating!

Monday, August 6, 2018

Servicing fails on step 6 while updating AOS

There are some hotfixes that patch modules and packages which are only available on the "onebox" sandbox (Tier 1) environments. If you happen to add these hotfixes to your VSTS Main Branch, you will most likely end up trying to install these modules and packages on your Tier 2 (ie UAT) environments, and this deployment will most likely fail. The reason is now the package has references to binaries which are not present on Tier 2.

One example is the module DemoDataSuite. From the deployment log you will find the following statement:

Running command: C:\DynamicsTools\nuget.exe install -OutputDirectory "G:\AosService\PackagesLocalDirectory\InstallationRecords" dynamicsax-demodatasuite -Source G:\DeployablePackages\GUID\AOSService\Packages

From the output, you would then find the following:

The running command stopped because the preference variable "ErrorActionPreference" or common parameter is set to Stop: Unable to resolve dependency 'dynamicsax-applicationfoundationformadaptor'.

It's true the DemoDataSuite depends on ApplicationFoundationFormAdaptor, and this Formadaptor Module is not on the Tier 2 environment. 

A simple solution is to simply change the default variables for the build defintion, and make sure the DemoDataSuite is excluded from package generation. 

Instructions on how to exclude named packages from the build can be found here:

If you suspect you've made custom modules and packages, and are worried they are causing your servicing to fail similarly, you may want to check the references yourself. Have a look at this post for more information on how to do that:

Friday, June 15, 2018

How do you apply the latest updates on Dynamics 365 Finance and Operations

When you deploy and environment of Dynamics 365 for Finance and Operations, you are asked to pick a version of the application along with the platform version. At the point of writing, the latest application version is 8.0 and platform version is 18. We know application version 8.0 and onwards to not allow for any overlayering of standard code. We also know that version 7.3 (the version prior to 8.0) allows overlayering.

If you choose to publish 7.3, you will get the application is it was in December 2017, and you will have to go through the process of applying a fair number of hotfixes to get your application updated.

In this post I will address this process. It is fairly well documented on docs, but I suppose it helps to read it from various sources. This post focus on the minimum effort needed to get updated. Depending on your scenario, it might be more complicated, if you for example have customizations, including extensions.

Before you leave this page, I should tell you there is a bonus part at the end of it.

This process is in two parts:
  1. Binary Updates
  2. Application Updates (or X++ Updates if you like)

Binary Updates

This part can actually be done by a non-developer. It is fairly easy to complete, and should be safe.

I start with updating a DEV environment, assuming it is aligned to the remaining environments (STAGE, PROD) when considering updates. From the environment page in LCS, I can tell there are lots of updates waiting to be installed.


I start by opening All Binary updates. Notice they are all already marked for download. You can't cherry pick these updates, you get them all. I could take only the platform updates instead, but I want everything updated, hence "All Binary updates".


When you continue, notice that you do not actually download the update, rather it is saved back to asset library.


This may take a while, as the entire thing is a couple of GB in total. Allow Asset Library analyze the package before you continue.


When the package is ready, you can go ahead and run "Maintain" and "Apply Updates" form the environment page. Pick the Binary Update package and allow for the Runbook to install it.


NOTE! This process will seed the package to your environment. Make sure you have enough space available on your Service Volume. You also want to make sure nobody is running Visual Studio on the machine while it is serviced. If your VM runs with standard disks (HDD) instead of premium storage (SSD), then the copying of files may time out. If that happens, just press the "Resume" button on the environment page. You might also notice that the machine even reboots as part of the process.

After the Binary Updates are installed, the tiles should hopefully report this.


Application Updates

The next process is a bit more technical and needs the attention of someone with a developer role.

Start by opening the Application Updates, not just the Critical Updates, but all of them. You will click "Select all" and press "Add". This will mark all of them for download.

Since I had over one thousand KBs, it took several seconds for LCS to create the download, so I simply had to wait for it to be sent to the browser for download. It is not a big file. In my example all updates were around 80MB.

The file is a Package.zip, so you will have to unblock it and unzip the file to get the actual HotfixPackageBundle.axscdppck file. That is a nice and long file extension, which I can only assume means AX Source Code Deployable Package. ;-)

Tip! Did you know the file is actually a compressed file using zip? If you change the file extension to zip and unpack it, you will see all the packages and a manifest defining any dependencies between them. If you even take one of the single packages out, change the file extension to zip, you can get the details of that package. What files will be changed and how elements will be changed, and also what KB numbers are covered by that package. 


Now, here comes the tricky part. While it is possible to apply this package through Visual Studio, I have found it safer to do the next part using command line util (SCDPBundleInstall.exe). Furthermore, I also ensure that there are no service or application potentially locking any files in the Package Local Directory. That means, no Visual Studio running, no IIS running and no Dynamics Ax Batch running. Have a look at the script I have shared at the end of this article.

The process is basically split in two steps:

  1. Prepare. This process analyze the content of the package and makes sure all files which will be changed in the Package Local Directory are put in source control (VSTS). That means add and edit commands, ensuring we can put them into VSTS if we mess up and need to go back to how things were before installing the updates. 
  2. Install. This process analyze the content of the package and actually change files in the Package Local Directory. Any files added or removed will also be put in the list of pending changes to source control (VSTS).

You cannot run them in one single operation, you need to run Prepare first, then commit the pending changes to VSTS. Then you run it again with the Install mode to change files.

The prepare step takes less time, but it does take time. If you want to see what it is actually doing, the closest you get is having a look under your users Temp folder. It will extract the packages and the dependency manifest under C:\Users\USERNAME\AppData\Temp\SCDPBundleInstall. You will observe the tool is extracting each package, looking at the manifest of the package, and checking what files the package will change. As part of this process, it also ensures the change is added to "pending changes". When the tool is done, it removes the folder.


When prepare is complete, you will have to open Visual Studio and commit the pending changes in order to "backup" the files to source control. Give this commit a good name, so you know it is related to preparing a hotfix bundle install. Starting Visual Studio will start IIS Express, and since you will close Visual Studio when your changes are committed, you will again have to ensure IIS is stopped before you run the install step.
Remember, when Visual Studio is closed, IIS Express is normally stopped and IIS is started. This process can take a couple of seconds, so wait a few seconds before you continue with the install step.

The install step takes the longest time, but also uses the same folder to extract and analyze the packages.

Before you go ahead and commit all the updates standard modules to VSTS from DEV, you will need to make sure it builds. Your customizations may be broken, and your overlayering may have new conflicts that needs to be resolved. All of this must be handled before the application updates are put in source control (VSTS).

From there, you initiate the BUILD, take out the final artifact containing all the updated application modules (packages) and put it up in Asset Library.

When you are ready to install in STAGE, start with the Binary Updates package in Asset Library, then install the Application Update package in Asset Library.

Some potential troubleshooting hints

I did run into some issues while doing this. All of which I had to resolve manually, and some were reported back to Microsoft Support.

You might experience delays when applying the application updates due to limitations of how many transactions you are allowed to do against VSTS. These are delays, so it should only mean things takes longer.

If you get errors while running the prepare or install, it might be something wrong with one of the packages, either due to invalid manifest or dependencies. I've only seen this a few times, and it is not expected. If that happens, contact Microsoft Support.

Also be aware that if one module fails to build for whatever reason, all modules depending on that module will most likely also throw errors. So don't fall off your chair if you get a high number of compilation errors. It might just be one error, creating a chain or other errors. Solve that one error, and the other go away.

Bonus

Using the SCDPBundleInstall tool is documented on docs, but for your convenience I will share a little PowerShell script that helps you run the prepare and install step. If you see any errors or improvements, I am grateful for all feedback.

function InstallHotfixBundle ([string] $file, [string]$vstsAccountName, [bool] $installMode = $false)
{
    $VSTSURI = 'https://{0}.visualstudio.com' -f $vstsAccountName

    # PLD is normally on C, J or K drive
    $pldPath = "\AOSService\PackagesLocalDirectory"
    $packageDirectory = "{0}:$pldPath" -f (('J','K')[$(Test-Path $("K:$pldPath"))],'C')[$(Test-Path $("C:$pldPath"))] 

    $command = ('prepare','install')[$installMode]

    if ($installMode -eq $true)
    {
        Write-Host "INSTALL MODE!" -f Yellow
        Get-Service w3svc | Stop-Service -Force
        Get-Service DynamicsAxBatch | Stop-Service -Force
    }
    else
    {
        Write-Host "PREPAREMODE ONLY!" -f Yellow
    }

    if (Test-Path -Path $file)
    {
        Unblock-File -Path $file
        $InstallUtility = '{0}\Bin\SCDPBundleInstall.exe' -f $packageDirectory
        $params = @(
            '-{0}' -f $command
            '-packagepath={0}' -f $file 
            '-metadatastorepath={0}' -f $packageDirectory
            '-tfsworkspacepath={0}' -f $packageDirectory
            '-tfsprojecturi={0}/defaultcollection' -f $VSTSURI
        )

        & $InstallUtility $params 2>&1 | Out-String

        if ($installMode -eq $true)
        {
            Write-Host "Hotfixes have been applied. Verify through build & sync, and commit the updates to VSTS!" -f Green
        }
        else
        {
            Write-Host "Touched elements ready for backup to VSTS. Commit changes before continue with install! Remember to close Visual Studio when you are done!" -f Green
        }
    }
    else
    {
        throw 'No such file {0}' -f $file
    }
}

# Remove the # to uncomment the line you want to run
#InstallHotfixBundle -file 'D:\Hotfix\HotfixPackageBundle.axscdppkg' -vstsAccountName 'YOUR_VSTS_ACCOUNT'
#InstallHotfixBundle -file 'D:\Hotfix\HotfixPackageBundle.axscdppkg' -vstsAccountName 'YOUR_VSTS_ACCOUNT' -installMode $true


Enjoy!

Wednesday, August 23, 2017

Consider changing your password Pop Up

Currently the machines deployed through LCS runs with the Account Policy that passwords has a 42 days age. Interestingly you should not change the password for servers deployed according to this statement of guidelines.

So if you get annoyed by the reminder to change the password and do not plan to republish the box any time soon, why not go ahead and get rid of the pop up.


Click the start button and type in "local". You should find the Local Security Policy Console.


From there it is just a matter of changing the expiration of the password to something other than 42, or simply set it to 0 for "never expire".


Quick and easy.

Alternatively you can use a Command Prompt (Run as Admin) with the statement:

net accounts /maxpwage:unlimited

Tuesday, June 10, 2014

Synchronization error when setting up AX2012 R3

This will be a quick post on an error I had when setting up a fresh AX2012 R3 installation. I was getting a bit ahead of myself and got stuck with an error when synchronizing the database.


And to help search engines find this post, the error in clear text:

Cannot create a record in Inheritance relation (SysInheritanceRelations). MainTableId: 12345.
The record already exists. 

The error is due to the fact that I didn't restart the AOS after compiling the application. Lesson is; don't rush and do it the right way the first time.
Furthermore, if you DO get stuck, try do a quick search on Life Cycle Services for a solution:
https://fix.lcs.dynamics.com/Issue/Results?q=SysInheritanceRelations

Restarted the AOS and continued the installation.

Saturday, May 31, 2014

Start and Stop your AX2012 R3 Azure Demos using PowerShell

There are tons of blog posts covering how to use PowerShell to control your Azure components, services, machines, etc. Once you download and install PowerShell for Azure and try it yourself, you see how easy you can manage Azure by running some simple commands. This post is here to help you AX'ers who have already started playing with Life Cycle Services and Cloud hosted AX2012 R3 Demos. You should be aware that each demo you create will cost money while it is running, so here is a post on how you can easily start and stop them using simple scripts instead of doing it through the Azure management portal.

I am going to assume your user is admin or co-admin on Azure, or you at least have credentials for such a user. I'm also going to assume you've downloaded PowerShell for Azure and installed it.

Start by opening PowerShell for Azure.


Run this command to authenticate for the next 12 hours:

Add-AzureAccount

You will be prompted for credentials, and you need to provide the same credentials you would be using if you were authenticating against Azure.

Use this command to Start demos:

Get-AzureService | Where-Object {$_.Label -match "AX2012R3"} | `
Foreach-Object { Start-AzureVM -ServiceName $_.ServiceName -Name "*" –Verbose }

If you change the filter part ("AX2012R3"), you could control a subset of your services based on some naming pattern or convention.

Use this command to Stop the demos:

Get-AzureService | Where-Object {$_.Label -match "AX2012R3"} | `
Foreach-Object { Stop-AzureVM -ServiceName $_.ServiceName -Name "*" –Force –Verbose }

Isn't that cool?

Now for the bonus part. When you create these demos, you access them through RDP-files. Here is a PowerShell command to download the RDP-files and save them to disk:

Get-AzureService | Where-Object {$_.Label -match "AX2012R3"} | `
Get-AzureRole -InstanceDetails | Where-Object {$_.RoleName -Match "DEMO" } | `
Foreach-Object { Get-AzureRemoteDesktopFile -ServiceName $_.ServiceName -Name $_.InstanceName `
-LocalPath (Join-Path "C:\Temp" ($_.InstanceName + ".rdp")) }

Pretty neat, ey? :-)

Saturday, December 14, 2013

Setup Life Cycle Services

If you haven't had time to check out Life Cycle Services (LCS) for Dynamics AX yet, then you should know you're missing out on some pretty cool features. Microsoft provides this service for Customers and Partners and I would encourage IT pros to check it out. You should at least install and test this in your own sandbox and test environment.

The LCS has been around for a while now. It was covered by the Technical Conference back in October 2012 and the service has evolved more since then. It was officially released summer 2013 and Microsoft has been improving it since. You can stay updated on latest news and changes by subscribing to the LCS Blog here: http://blogs.msdn.com/b/lcs/

I didn't set aside enough time to check it out right away when it was published, but lately I have been testing it and I wanted to post a short article on my findings. Life Cycle Services is covering a lot of ground, but I will focus on System Diagnostics collection part.

So you begin this by creating a new project on the Life Cycle Services website. Log on with the Microsoft Account (aka. LiveID) associated with your Customer or Partner account. Navigation is simple and intuitive, so I'll assume you figure out how to create your new project. You will have to add additional team members manually, but it is just as easy as creating a new project.

The idea here is to have a project where you can collect diagnostics from one or multiple environments.


When the project is created, you can open it and then Open the System Diagnostics tile. By default, you will be thrown in the Admin section and from there you can download the installer of the LCS Service. Installing the Service is pretty straight forward. Just follow the steps in the guide and you should be good. It takes just a few minutes. I opted for using the business connector as the Service Account. If the installer says the service couldn't start, just head over to Group Policy and make sure the service account actually is allowed to run as a service. If you want this to be a smooth experience, you probably should go through the security setup mentioned in the install guide. If you do implement permissions locally after the service has been installed and started, remember to restart the service. Otherwise it will not pick up any changed permissions.


The next step is to upload environment(s) to the project. You use the LCS Environment Discovery Tool for this. Start by typing in a name for the environment. This will be visible in the LCS website so make sure to use a name that makes sense. Type in SQL Server instance and the name of the business database. Then hit "Discover" and observe if the tool discovers the instance. If it fails, you've most likely forgot to grant the service account read access to the database. If it succeeds, simply press "Upload" to have the environment be available in the LCS website. You can redo this for more environments if needed.


In order to keep the website updated on the environments health, you should add a task that uploads updated information to the website. Just use the Generate command button to create the command line, and add a scheduled task for it. Make sure it runs even though you're not logged in.

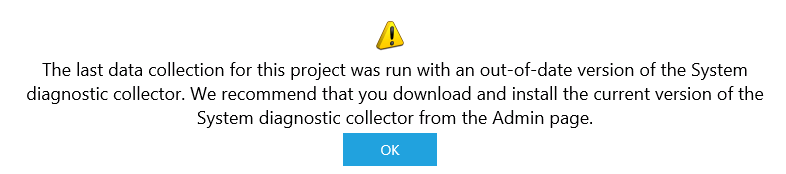
I should add that I recently got a message on one of my other projects stating that the LCS had updated the on premise tool. I simply downloaded, stopped the service, ran setup, reused the existing certificate, and it was updated. Lovely!


And that is it. I expect more improved content and features on the LCS website in the future.