Introduction
[EDIT]: Changes since November 2018 has forced me to made some changes to these series. I will point out the changes.In these series of posts. I will try to run you through the process of how you can complete the upgrade from 7.x to 8.+ of Dynamics 365 for Finance and Operations.
Quick navigation:
Upgrade from 7.x to 8.+ series | Post 1 | Start in LCS
Upgrade from 7.x to 8.+ series | Post 2 | Deploy Dev and Grab source DB
Upgrade from 7.x to 8.+ series | Post 3 | Validate Code and Data in Dev
Upgrade from 7.x to 8.+ series | Post 4 | Setup a new Build (you are here)
Upgrade from 7.x to 8.+ series | Post 4 | Upgrade Sandbox and finally Production
Upgrade from 7.x to 8.+ series | Post 4 | Upgrade Sandbox and finally Production
Some preparations before deploying Build VM
Basically, what we want to do is to have the new 8+ branch the build environment will pull code from. Beyond that you may want to have additional development branch to isolate ongoing development in the future, but I've left that out of the scope of this article.If you've read the previous posts, you know the Code Upgrade in LCS created a "release" branch folder with a prepared upgraded application, and given that you've completed the code upgrade and validation as mentioned in the previous post, you should now be able to copy the result over to a new main branch for 8+.
The flow can be displayed sort of like this:

Now, obviously you're most likely going to delete/remove the old main branch and possibly also the "release" branch in the future. But the flow above can still be achieved. There are many ways to actually do this, and some have very strong opinions on how to branch the source.
You can easily create a new main branch by using the prepared "release" as source. You can do this using Source Code Explorer inside of Visual Studio running on your development VM.

You will simply give the new branch a unique name, separating it from the old main.

The name of the branch can actually be changed later, if that bothers you. However, we will deploy a Build environment later, and this will create a Build definition that needs the branch name to be correct - or the build definition will not work.
Don't forget, your changes locally on the VM will need to be committed to Azure DevOps (VSTS).

Another thing we will want to do is to create ourselves an isolated Agent Pool in Azure DevOps (VSTS). We want to make sure only 8+ build agents are in this pool of agents. You will need at least one, but who knows if you will add more in the future.
You will need some permissions in Azure DevOps (VSTS) to create this, but start at the Organization level and create a new Pool. I named it D365FO81 (since it will be used for 8.1.x). I have lots of projects not related to Dynamics, so I didn't want to push the agent pool to all projects.

I then opened the Project itself and added the Agent Pool to the project.

Deploy Build VM
[EDIT]: This section has been edited.Now, we are ready to head back to LCS and deploy a Build VM. And with the preparation above, we can fill out the VSTS-part like this, and it will make sure to put the build agent on the right pool, plus make sure the deployed build defintion points to the right branch.

Select the correct topology, and if you're deploying this on a private/self hosted Azure Subscription, you can chose a setup with DS13v2 and 14 standard disks of size 64GB. Again, leaning on the community here to learn what they recommend. These things change over time, and I can't promise I'll get back to this post and update it.
If you deleted the existing MS Hosted build environment, and deploy a new MS Hosted, you won't get any options to decide on VM size or disk setup.
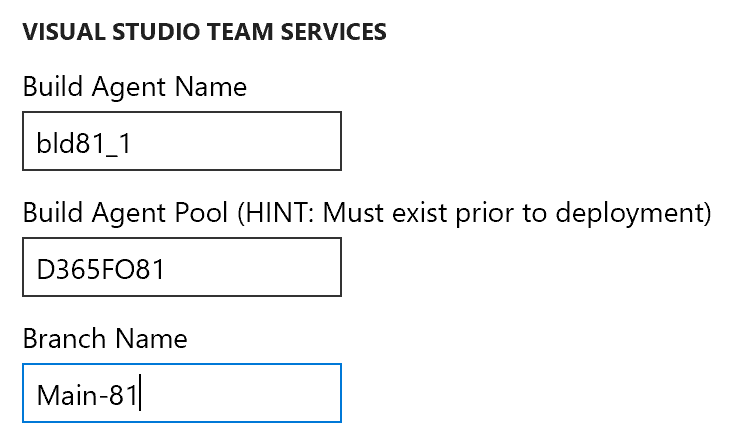
Notice I fill in the name of the Agent Pool and the name of the branch. I also give the agent a unique name. It will take quite some time before the Build environment is up and running.
EDIT: Before you continue, go ahead and install the same update package installed on the Development environment from step 3 in my series. Installing this same "Platform and application binary package" on the Build environment will ensure the build is running on the exact same version, and the artifact created from the build pipleline is of the same version. The next time, in the future, you want to get more updates of the platform and application, you can create the update package through the Update tiles on the Build environment.
When it is, you will go ahead and schedule a build on the new Build Definition. The job will be picked up by the right Agent Pool, and then picked up by the agent sitting on the Build VM.
When the Build is complete, make sure to upload the Deployable Package to the LCS Asset Library. You will need it for the final post.
No comments:
Post a Comment