If you choose to publish 7.3, you will get the application is it was in December 2017, and you will have to go through the process of applying a fair number of hotfixes to get your application updated.
In this post I will address this process. It is fairly well documented on docs, but I suppose it helps to read it from various sources. This post focus on the minimum effort needed to get updated. Depending on your scenario, it might be more complicated, if you for example have customizations, including extensions.
Before you leave this page, I should tell you there is a bonus part at the end of it.
This process is in two parts:
- Binary Updates
- Application Updates (or X++ Updates if you like)
Binary Updates
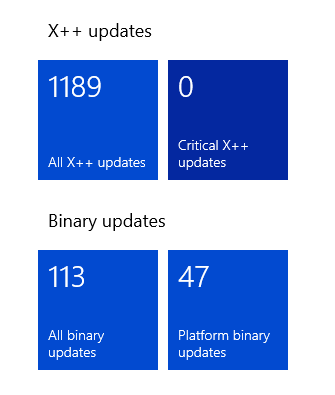
This part can actually be done by a non-developer. It is fairly easy to complete, and should be safe.I start with updating a DEV environment, assuming it is aligned to the remaining environments (STAGE, PROD) when considering updates. From the environment page in LCS, I can tell there are lots of updates waiting to be installed.
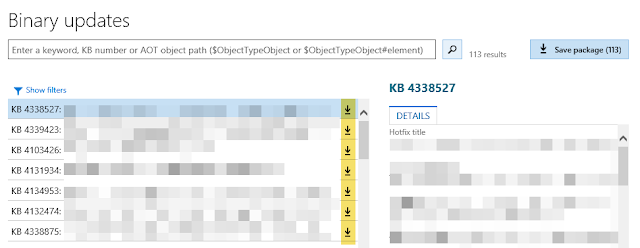
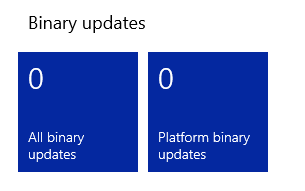
I start by opening All Binary updates. Notice they are all already marked for download. You can't cherry pick these updates, you get them all. I could take only the platform updates instead, but I want everything updated, hence "All Binary updates".
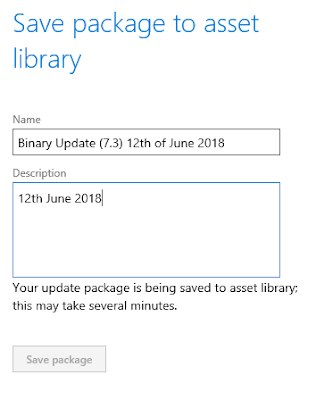
When you continue, notice that you do not actually download the update, rather it is saved back to asset library.
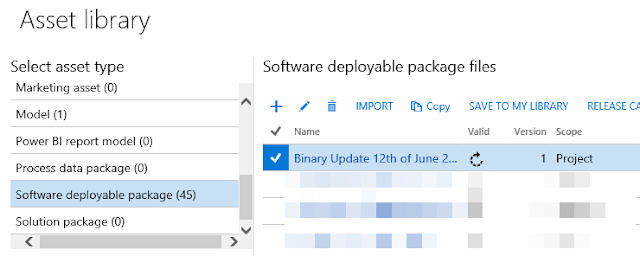
This may take a while, as the entire thing is a couple of GB in total. Allow Asset Library analyze the package before you continue.
When the package is ready, you can go ahead and run "Maintain" and "Apply Updates" form the environment page. Pick the Binary Update package and allow for the Runbook to install it.
NOTE! This process will seed the package to your environment. Make sure you have enough space available on your Service Volume. You also want to make sure nobody is running Visual Studio on the machine while it is serviced. If your VM runs with standard disks (HDD) instead of premium storage (SSD), then the copying of files may time out. If that happens, just press the "Resume" button on the environment page. You might also notice that the machine even reboots as part of the process.
After the Binary Updates are installed, the tiles should hopefully report this.
Application Updates
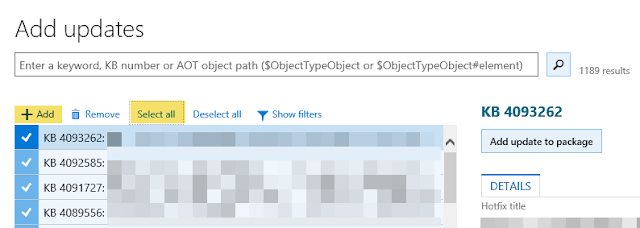
The next process is a bit more technical and needs the attention of someone with a developer role.Start by opening the Application Updates, not just the Critical Updates, but all of them. You will click "Select all" and press "Add". This will mark all of them for download.
Since I had over one thousand KBs, it took several seconds for LCS to create the download, so I simply had to wait for it to be sent to the browser for download. It is not a big file. In my example all updates were around 80MB.
The file is a Package.zip, so you will have to unblock it and unzip the file to get the actual HotfixPackageBundle.axscdppck file. That is a nice and long file extension, which I can only assume means AX Source Code Deployable Package. ;-)
Tip! Did you know the file is actually a compressed file using zip? If you change the file extension to zip and unpack it, you will see all the packages and a manifest defining any dependencies between them. If you even take one of the single packages out, change the file extension to zip, you can get the details of that package. What files will be changed and how elements will be changed, and also what KB numbers are covered by that package.
Now, here comes the tricky part. While it is possible to apply this package through Visual Studio, I have found it safer to do the next part using command line util (SCDPBundleInstall.exe). Furthermore, I also ensure that there are no service or application potentially locking any files in the Package Local Directory. That means, no Visual Studio running, no IIS running and no Dynamics Ax Batch running. Have a look at the script I have shared at the end of this article.
The process is basically split in two steps:
- Prepare. This process analyze the content of the package and makes sure all files which will be changed in the Package Local Directory are put in source control (VSTS). That means add and edit commands, ensuring we can put them into VSTS if we mess up and need to go back to how things were before installing the updates.
- Install. This process analyze the content of the package and actually change files in the Package Local Directory. Any files added or removed will also be put in the list of pending changes to source control (VSTS).
You cannot run them in one single operation, you need to run Prepare first, then commit the pending changes to VSTS. Then you run it again with the Install mode to change files.
The prepare step takes less time, but it does take time. If you want to see what it is actually doing, the closest you get is having a look under your users Temp folder. It will extract the packages and the dependency manifest under C:\Users\USERNAME\AppData\Temp\SCDPBundleInstall. You will observe the tool is extracting each package, looking at the manifest of the package, and checking what files the package will change. As part of this process, it also ensures the change is added to "pending changes". When the tool is done, it removes the folder.
When prepare is complete, you will have to open Visual Studio and commit the pending changes in order to "backup" the files to source control. Give this commit a good name, so you know it is related to preparing a hotfix bundle install. Starting Visual Studio will start IIS Express, and since you will close Visual Studio when your changes are committed, you will again have to ensure IIS is stopped before you run the install step.
Remember, when Visual Studio is closed, IIS Express is normally stopped and IIS is started. This process can take a couple of seconds, so wait a few seconds before you continue with the install step.
The install step takes the longest time, but also uses the same folder to extract and analyze the packages.
Before you go ahead and commit all the updates standard modules to VSTS from DEV, you will need to make sure it builds. Your customizations may be broken, and your overlayering may have new conflicts that needs to be resolved. All of this must be handled before the application updates are put in source control (VSTS).
From there, you initiate the BUILD, take out the final artifact containing all the updated application modules (packages) and put it up in Asset Library.
When you are ready to install in STAGE, start with the Binary Updates package in Asset Library, then install the Application Update package in Asset Library.
Some potential troubleshooting hints
I did run into some issues while doing this. All of which I had to resolve manually, and some were reported back to Microsoft Support.You might experience delays when applying the application updates due to limitations of how many transactions you are allowed to do against VSTS. These are delays, so it should only mean things takes longer.
If you get errors while running the prepare or install, it might be something wrong with one of the packages, either due to invalid manifest or dependencies. I've only seen this a few times, and it is not expected. If that happens, contact Microsoft Support.
Also be aware that if one module fails to build for whatever reason, all modules depending on that module will most likely also throw errors. So don't fall off your chair if you get a high number of compilation errors. It might just be one error, creating a chain or other errors. Solve that one error, and the other go away.
Bonus
Using the SCDPBundleInstall tool is documented on docs, but for your convenience I will share a little PowerShell script that helps you run the prepare and install step. If you see any errors or improvements, I am grateful for all feedback.function InstallHotfixBundle ([string] $file, [string]$vstsAccountName, [bool] $installMode = $false)
{
$VSTSURI = 'https://{0}.visualstudio.com' -f $vstsAccountName
# PLD is normally on C, J or K drive
$pldPath = "\AOSService\PackagesLocalDirectory"
$packageDirectory = "{0}:$pldPath" -f (('J','K')[$(Test-Path $("K:$pldPath"))],'C')[$(Test-Path $("C:$pldPath"))]
$command = ('prepare','install')[$installMode]
if ($installMode -eq $true)
{
Write-Host "INSTALL MODE!" -f Yellow
Get-Service w3svc | Stop-Service -Force
Get-Service DynamicsAxBatch | Stop-Service -Force
}
else
{
Write-Host "PREPAREMODE ONLY!" -f Yellow
}
if (Test-Path -Path $file)
{
Unblock-File -Path $file
$InstallUtility = '{0}\Bin\SCDPBundleInstall.exe' -f $packageDirectory
$params = @(
'-{0}' -f $command
'-packagepath={0}' -f $file
'-metadatastorepath={0}' -f $packageDirectory
'-tfsworkspacepath={0}' -f $packageDirectory
'-tfsprojecturi={0}/defaultcollection' -f $VSTSURI
)
& $InstallUtility $params 2>&1 | Out-String
if ($installMode -eq $true)
{
Write-Host "Hotfixes have been applied. Verify through build & sync, and commit the updates to VSTS!" -f Green
}
else
{
Write-Host "Touched elements ready for backup to VSTS. Commit changes before continue with install! Remember to close Visual Studio when you are done!" -f Green
}
}
else
{
throw 'No such file {0}' -f $file
}
}
# Remove the # to uncomment the line you want to run
#InstallHotfixBundle -file 'D:\Hotfix\HotfixPackageBundle.axscdppkg' -vstsAccountName 'YOUR_VSTS_ACCOUNT'
#InstallHotfixBundle -file 'D:\Hotfix\HotfixPackageBundle.axscdppkg' -vstsAccountName 'YOUR_VSTS_ACCOUNT' -installMode $true
Enjoy!
